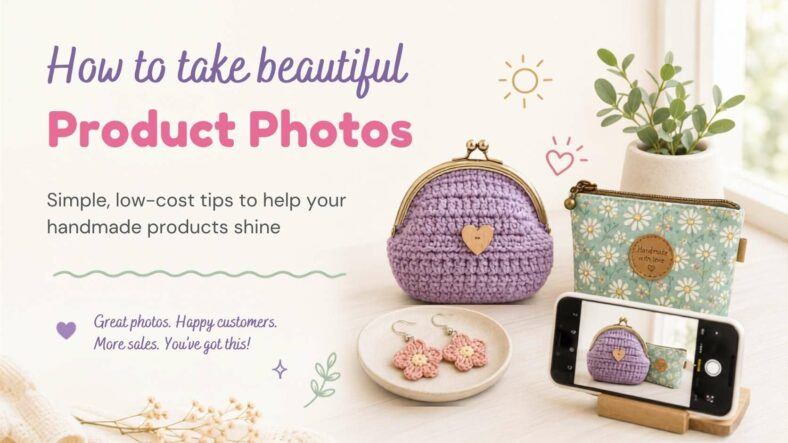
Lovely product photos can make such a HUGE difference to your shop. They help customers understand your handmade item, imagine using it, and feel confident buying from you.
You do not need fancy camera equipment, a spotless house, expensive props or lots of energy to take great product photos. A phone, some daylight, a simple background and a little planning are all you need. Here is a manageable guide for taking great product photos on a budget with limited energy so it feels manageable.
Why Product Photos Matter
Your photos are THE first thing a customer sees. A strong product photo helps customers:
🩷 See the colours, texture, size, and detail
🩷 Understand what they are buying
🩷 Imagine the item in their home
🩷 See your product is handmade with care
🩷 Feel more confident clicking “add to basket”
The Mightie Photo Checklist
For most handmade products, a great photo needs five things:
✅ Good light
✅ A tidy, simple background
✅ Your product clearly in focus
✅ A square photo with space around the item
✅ Enough photos to answer customer questions
✅ File size under 500kb, Image Size approx 1000 x 1000 px
That’s it. No professional studio required.
Start With Your Main Photo
Your main product photo is the one customers see first when browsing Mightie Makers.
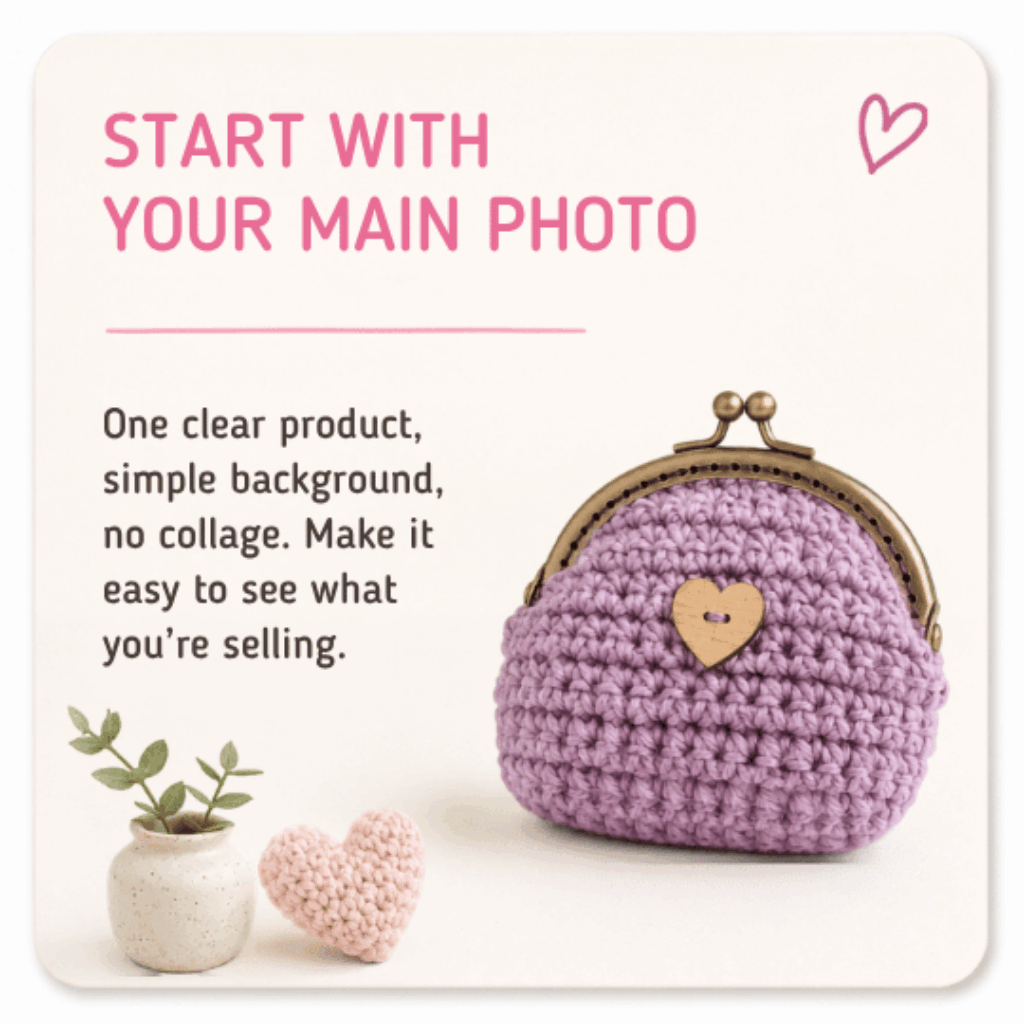
For your main photo, aim for:
🩷 One clear product as the focus
🩷 A simple background
🩷 No collage
🩷 No heavy borders or filters
🩷 No distracting props
🩷 The whole product visible
🩷 Space around the edges so nothing gets cropped
Think of your main photo as your product’s little shop window. Customers should be able to tell what the item is within a second or two.
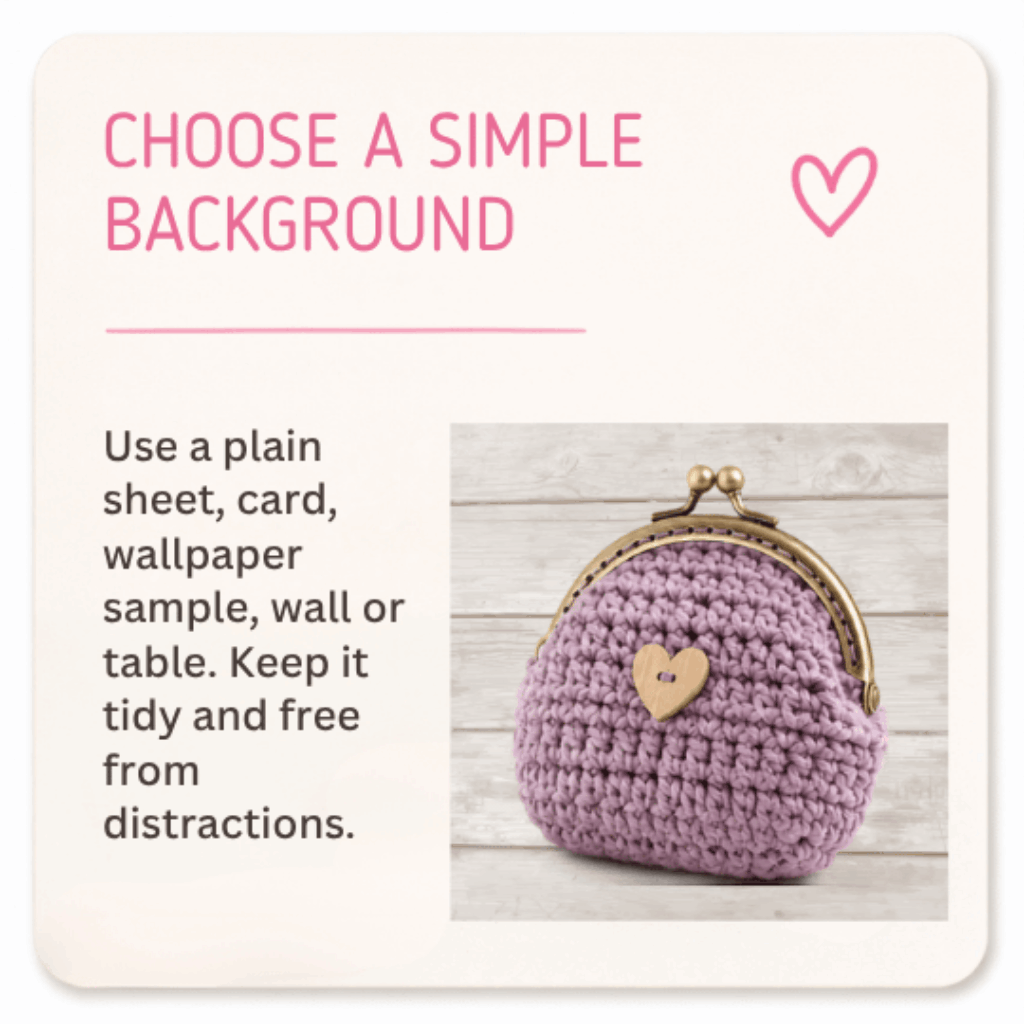
Choose An Easy Background
A clean background helps your handmade item stand out. You don’t need a photography backdrop. Budget-friendly options include:
🩷 A large sheet of card
🩷 Wallpaper samples
🩷 Wrapping paper with a very subtle pattern
🩷 A wooden table
🩷 A plain wall
🩷 A clean bath or shower tray for small items
🩷 A large tray you can set up while seated
Try to avoid anything too busy behind your product, such as clutter, strong patterns, bed linen, laundry, paperwork, pet bowls, cables, or personal items.
If your product is light coloured:
Use a slightly darker background so it does not disappear.
For example:
🩷 White earrings may look better on pale grey, blush pink, wood, or soft blue
🩷 Cream crochet may stand out better on sage green, denim, or kraft card
🩷 Silver jewellery may need a warmer or darker background
If your product is dark coloured:
🩷 Try a lighter background so the shape and details are easier to see.
Keep Props Simple
Props can be lovely, but they should support the product rather than compete with it.
Good props might include:
🩷 A mug with fingerless gloves
🩷 A book with a bookmark
🩷 A wrapped gift beside a handmade card
🩷 A plant near a home decor item
🩷 A planner with a handmade pencil case
🩷 A jewellery dish with earrings
Try not to use too many props, as customers may become unsure which item is actually for sale.
Tips:
If the prop pulls your eye away from the handmade item, remove it.
You can also add a small note in your description, such as “Props are for photo styling only.”
Use Natural Light When Possible
Good lighting is one of the easiest ways to improve your photos.
The best light is usually:
🩷 Near a window
🩷 In daylight
🩷 Bright but not harsh
🩷 Soft and even
Try placing your product on a table, tray, or board near a window. Avoid direct strong sunlight if it creates harsh shadows or makes colours look washed out. A bright but cloudy day can be wonderful for product photos.
Low-energy lighting tip:
If moving around is difficult, create one small photo spot that you can reuse.
This could be:
🩷 A tray near a window
🩷 A small folding table
🩷 A board on your bed
🩷 A clear corner of a desk
🩷 A large piece of card you can keep nearby
Having a repeatable set-up can make photo days feel much easier.
How To Soften Shadows
If one side of your product looks too dark, you can bounce light back onto it.
You can use:
🩷 A piece of white card
🩷 A white envelope
🩷 A pale chopping board
🩷 A sheet of white paper
Place it opposite the window, beside your product. It will reflect light back and soften the shadow.
This is a simple product photography trick that costs almost nothing.
If You Can’t Use Daylight
Natural light is lovely, but it is not always possible. Energy, pain, weather, mobility, caring responsibilities, and darker winter days can all make photography harder.
Other options include:
🩷 A daylight craft lamp
🩷 A small LED desk lamp
🩷 A budget light box
🩷 A ring light on a low setting
🩷 Two lamps placed either side of the product
Try to avoid mixing lots of different light colours. For example, daylight from a window plus a very warm yellow lamp can make colours look strange.
If your photo looks too yellow or too blue, try using the edit tools on your phone to gently adjust the warmth.
Take Square Photos
Mightie Makers product images work best as square photos.
Please aim for:
1000 x 1000 pixels
Square format
Under 500 KB
Square photos help products look neat and consistent across the website. Many phones have a square photo setting in the camera app. If yours does, use it.
If your phone does not take square photos, take the photo from a little further back, with extra space around the product. You can crop it into a square afterwards using your phone, Canva, Fotor, Preview, Paint, or another free editing tool.
Important cropping tip:
Do not fill the whole image edge-to-edge with your product. Leave space around the top, bottom, and sides. This helps stop your item being cropped awkwardly on the website or when shared on social media.
Centre your product, but give it breathing space
For your main photo, place the product near the centre of the image.
Leave a little room around it so the photo feels calm and clear.
This is especially important for:
🩷 Long items like scarves, garlands, dog leads, bookmarks, and keyrings
🩷 Tall items like bottles, vases, dolls, and signs
🩷 Items with handles, straps, tassels, or hanging loops
🩷 Anything that might get cropped in a thumbnail
A little background space is your friend.
Make sure the product is in focus
Before you take the photo, tap the product on your phone screen. This tells your camera where to focus.
Try to keep your hands steady.
Helpful low-cost options:
🩷 Rest your elbows on a table
🩷 Lean your phone against a mug or stack of books
🩷 Use a budget phone tripod
🩷 Use the timer setting so your hand is not moving the phone as the photo takes
🩷 Take several photos and choose the sharpest one
Blurry photos can make customers hesitate, even when the product itself is beautiful.
Show the size clearly
Customers cannot pick up your handmade item, so your photos need to help them understand scale.
You can show size by including:
🩷 A hand holding the item
🩷 A mug beside it
🩷 A book or notebook
🩷 A ruler or tape measure
🩷 A model wearing jewellery, hair accessories, scarves, hats, or bags
🩷 A product shown in use
For example:
🩷 Earrings shown worn help customers understand drop length
🩷 A pouch beside a notebook helps customers picture what fits inside
🩷 A dog bandana shown on a dog helps customers understand shape and fit
🩷 A mug cosy on a mug instantly explains its purpose
If the scale prop is not included, make that clear in your description.
Show your product being used
Lifestyle photos can be very powerful because they help customers imagine the item in real life.
Examples:
🩷 Fingerless gloves holding a warm drink
🩷 A handmade card beside a wrapped gift
🩷 A scrunchie styled in hair
🩷 A bag being worn
🩷 A wall hanging on a wall
🩷 A pet collar accessory on a collar or harness
🩷 A candle or wax melt photographed in a cosy home setting, where safe and suitable
The customer is not just buying an object. They are often buying a feeling, a gift, a treat, a solution, or a little moment of joy.
Take more than one photo
Your main photo gets the click, but your gallery photos help secure the sale.
Try to include:
🩷 Front view
🩷 Back view
🩷 Close-up detail
🩷 Size or scale photo
🩷 Packaging photo if it is gift-ready
🩷 In-use or lifestyle photo
🩷 Colour or variation photo if there are options
🩷 Any important fastenings, clasps, pockets, linings, labels, or textures
You do not need hundreds of photos. A small set of helpful images is much better than one unclear photo.
Show details customers care about
Think about what a customer might ask before buying.
For handmade crafts, useful detail photos may include:
🩷 Stitching
🩷 Texture
🩷 Fabric print
🩷 Beadwork
🩷 Clasps
🩷 Hooks
🩷 Fastenings
🩷 Lining
🩷 Inside pockets
🩷 The back of the item
🩷 Gift packaging
🩷 Personalisation options
🩷 Safety labels or care labels where relevant
Clear detail photos can reduce questions and help customers feel more confident.
Avoid collages for the main image
Collages can make products look tiny in search results and category pages.
Your main image should usually be one strong photo of the product.
If you want to show multiple angles, use the product gallery instead. That way customers can click through and see each image clearly.
Be careful with frames, borders, stickers, and effects
Frames, borders, filters, stickers, and decorative overlays can distract from your handmade item.
They can also make the image look smaller on the website.
For product listings, simple is usually best.
Try to avoid:
🩷 Thick borders
🩷 Heavy filters
🩷 Sparkle effects over the product
🩷 Text covering the item
🩷 Busy collage templates
🩷 Strong colour tints that change how the product looks
Let your lovely handmade item be the star.
Watermarks
If you choose to use a watermark, keep it very faint and place it away from the main product detail.
Avoid covering:
🩷 Jewellery details
🩷 Fabric patterns
🩷 Faces on artwork or dolls
🩷 Text on cards or signs
🩷 Personalisation examples
🩷 Anything the customer needs to inspect before buying
A watermark should not stop a customer from seeing what they are buying.
Photograph shiny items carefully
Jewellery, glass, resin, glossy cards, and metal items can catch reflections.
Try:
🩷 Photographing near a window, not in direct sun
🩷 Turning the item slightly
🩷 Moving yourself so you are not reflected
🩷 Using white card nearby to soften reflections
🩷 Placing shiny items on matte fabric or card
🩷 Avoiding flash
If the product is very reflective, take several photos from slightly different angles and choose the clearest one.
Photograph fabric, yarn, and texture
For fabric, crochet, knitting, embroidery, and textile items, customers love seeing texture.
Try adding:
🩷 A full product photo
🩷 A close-up of the fabric or stitch detail
🩷 A photo showing lining or backing
🩷 A photo showing thickness or softness
🩷 A photo showing how it is used or worn
Soft handmade items often sell better when customers can almost “feel” them through the photo.
Optimise Your Photos To Improve Page Load Time
Reduce your images in bulk for FREE using Free Image Resizer website 🎉

